Table of Contents
Summarize with AI
Your WordPress website is ready, and now you want to Migrate WordPress site from your localhost to a live server, right? Well, building and testing your websites on your localhost is good practice, and even if something goes wrong, it doesn’t affect your live website. But it could be a tedious process if you don’t know how to transfer site from Localhost to a live web server. So in this tutorial, we will go through the step by step setup. Plus I will show you how to migrate the WordPress site from localhost to the live server in an easy way. Let’s start:
We have an installation on Xampp Server with WordPress and a ThemeRally template that we will upload to our hosting account.
Export Database
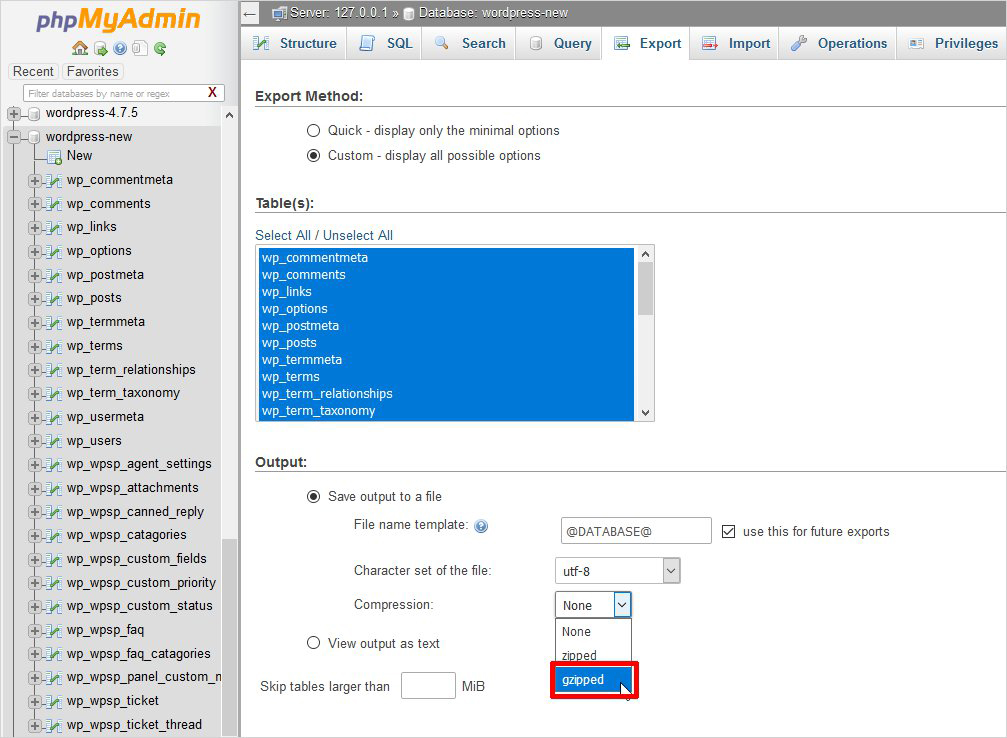
The first thing we are going to do is to export the database that we have locally. For this, having the services of our local server started. We add the address http://localhost/phpmyadmin in the browser and we will access the phpMyAdmin database manager.
We just have to select the database used by the installation and click on “Export”.
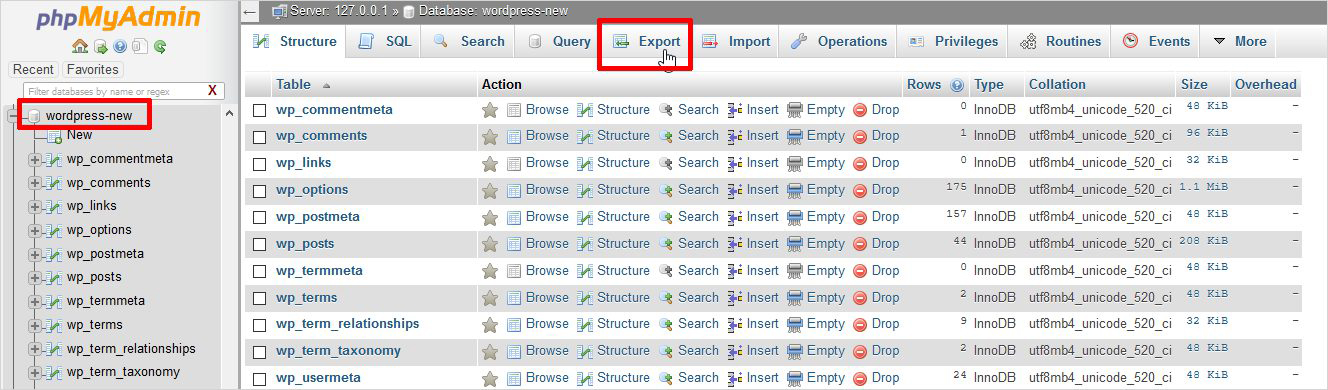
Next, click on the “Continue” button and download the SQL file with our database.
Compress Files
The next step will be to compress the files that we have in our local installation to be able to upload them to our hosting account.
For this example, we use Xampp as a local server where it stores all facilities in the folder htdocs so we have only to write to the disk C- folder > xampp- folder > htdocs and compress files in the folder that is where we install to migrate.
You can install Xampp from here.
To compress the file we can use an application such as WinRAR. We access the folder where we have the installation and select all the files. With the right mouse button, we select the option “Add to file”.
In the General tab, in the “File format” block, select the “ZIP” option.
Click on “accept” and a new file will be created in ZIP format that will be the one that we will have to upload to our hosting account.
We would already have everything we need, we have the database and all the files for our application, the next step will be to import the database and upload the files to our hosting account.
Upload Files to Our Hosting to Migrate WordPress from Localhost to Server
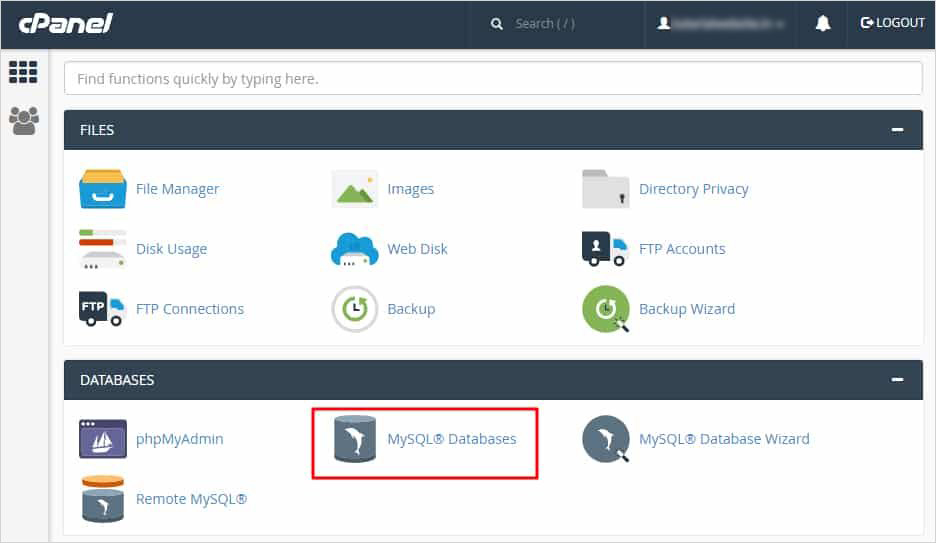
To upload the files to our hosting account we will use the file manager of our cPanel.
The first thing we have to do is to check which folder our domain points to, normally it will always point to a folder with the domain name or the public_html folder.
To check this, we access the “Domains” block of our cPanel account and click on the ” Domains ” item.
On the domains page, we can see a table with a list of all the domains that we have added to our cPanel account. The column “Document root” shows us the path/folder to which each domain points.
One possible cause is that we still do not have the domain added to our cPanel account, this usually happens if it is not our main domain and we are adding a new domain.
In the event that you have to add an additional domain, select “Add-on domains ” in the Domains block. We will only have to add the domain in the cell ” New domain name ” and click on ” Add Domain “.
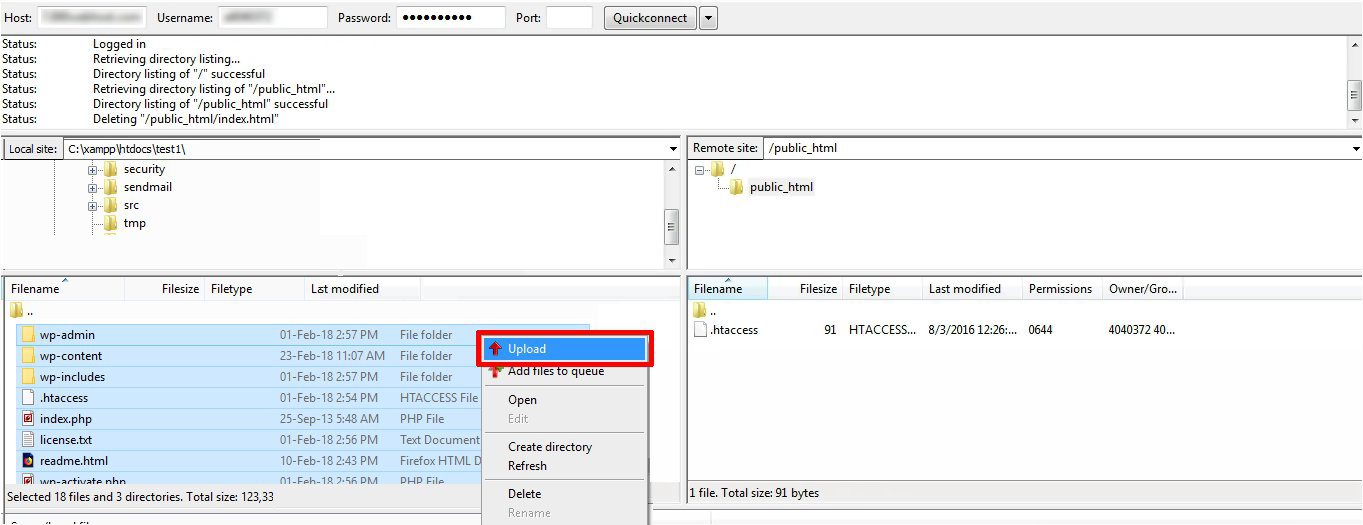
Once the folder that our domain points to is located, the next step will be to upload the files. We select the file manager of our cPanel account to upload the files. On the left side, we will see a file tree with the folders that we have created on our server, we select the public_html folder of our domain.
At the top we have the file manager menu, click on the “Upload” item to upload the files. Click on the ” Select file ” button and upload the ZIP with the files that we locally have.
We return to the domain mask, select the zip file with the right mouse button and click Extract to extract the files from the Zip.
Create and Import Database
The next step will be to create a database for our installation and import what we had in Local to transfer the WordPress site from localhost to the live server site.
To create our database, we select “MySQL databases” that we find in the “Databases” block of our cPanel.
In the Block “Create new database” we will add a name for our database in the cell “New database”, we can put the name we want and click on the Create database button.
As for advice, if we are using several databases, it would be to put a name that identifies it.

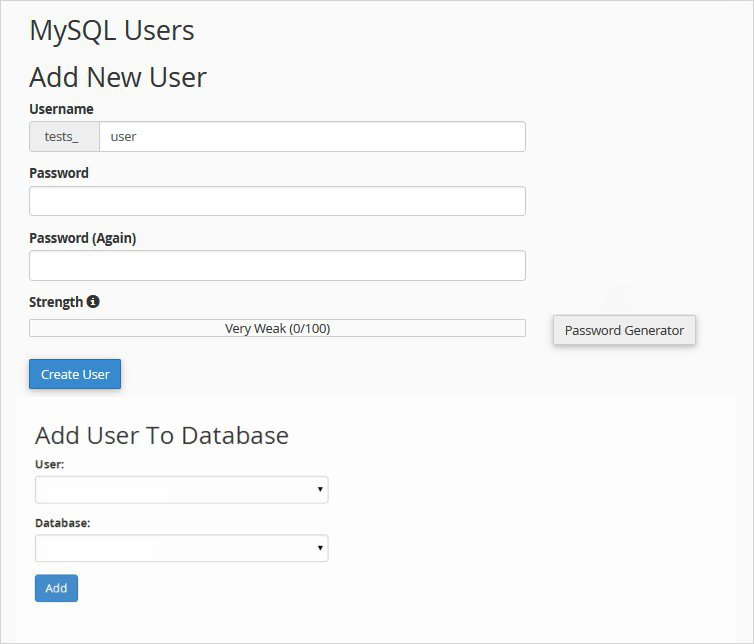
Create Database User
The next step will be to create a user for our database. On the same page of “MySQL databases”, we have the block ” Add New User “.
We add a username, you can put the one you want and a password. In the password section, we can generate a password with the Password Generator button or we simply add one ourselves.
Take note of the data of both the database name and the username and password, we will need to finish configuring the web data.
To finish with the creation of the database, we only need to assign the user to the database that we have created previously.
As simple as selecting the database and the user from the drop-down that we have in the Add user to the database block and clicking on the “Add” button.
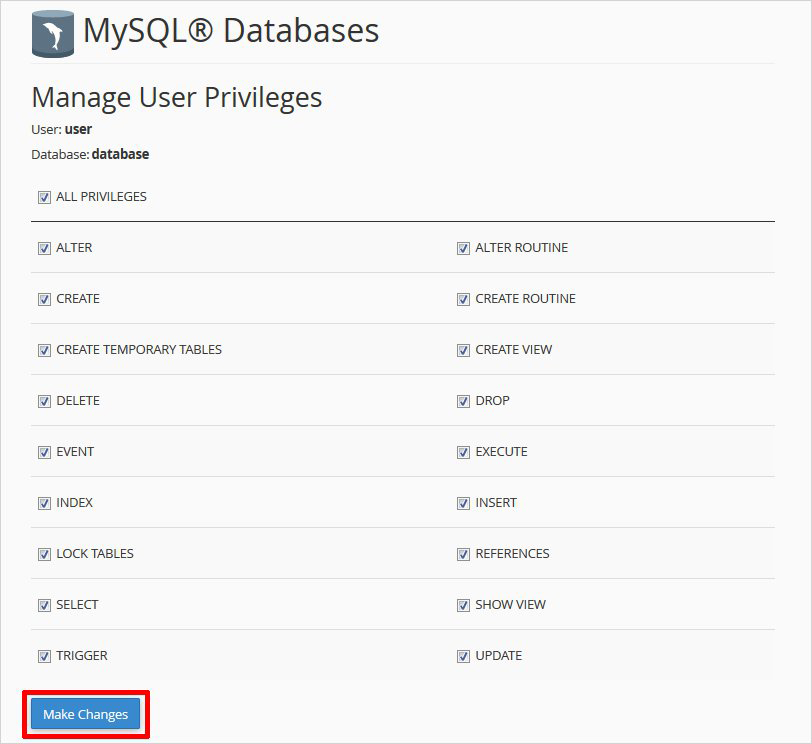
Once the user has been added, it will ask us to assign the privileges for that user. Select all the privileges and click on the Make Changes button.
With this we will have our database created and assigned to our user, now we will have to import the database that we exported from the installation that we had locally to the database that we have created.
Import Database
The next step to migrate WordPress from localhost to server will be to import the database that we exported locally.
In our Cpanel account the “Databases” block we select the application “phpMyAdmin“. Once in our phpMyAdmin Database Manager, we select the database that we have created and click on Import.
Click on the Select File button to load the file that we have previously exported from the application locally and click on “Continue”. Importing can take a while and will depend on the weight of the file and the amount of data you have to import.
Modify Options Table
As our local website pointed to localhost/folder we need to modify those URLs so that they point to our domain
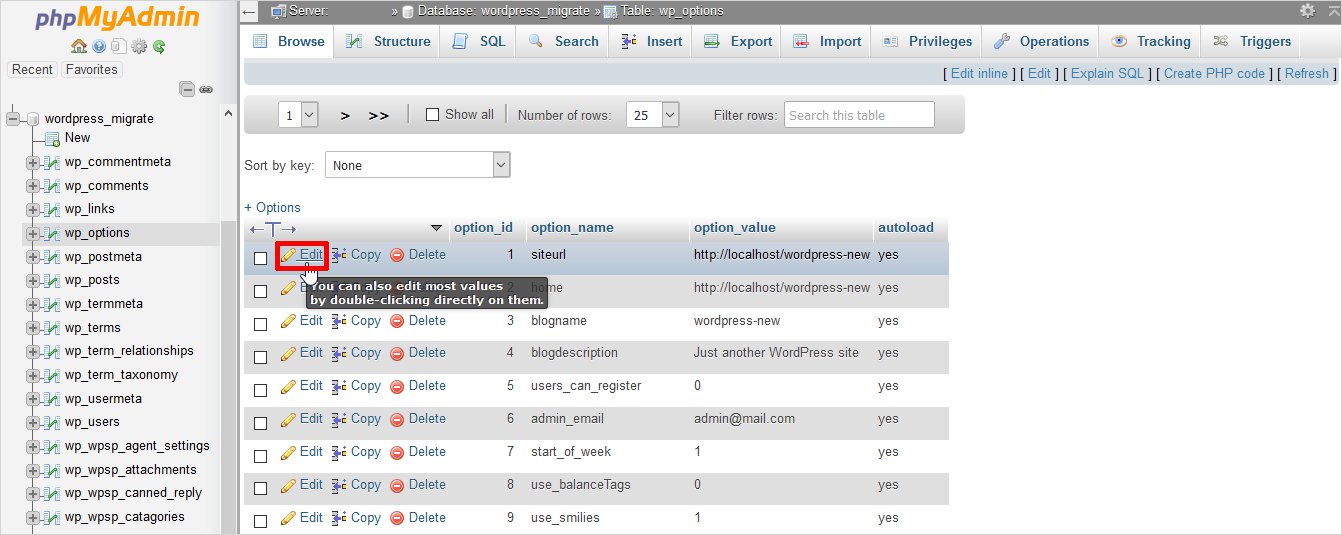
Without leaving phpMyAdmin (Database) we will edit the _options table to modify the URLs to our installation points.
We click “Examine” in the _options table.
We edit the cells “site URL and home” and modify the URLs for our domain.
Already tense the uploaded files and the database created and imported. So we would only have to modify the data of the database that we have in the wp-config.
You May Also Read: How To Easily Disable Comments in WordPress
Modify wp-config File
The wp-config file stores the access data to the database and having the installation locally has the access data that our inflationist had on the PC, we have to modify these data for those of our database.
We edit the wp-config file that is at the root of the domain folder. To edit it, we just have to select it with the button on the right and click on “Edit”
Inside the file, we see several defines
- DB_NAME we indicate the Name of the database that we have created
- DB_USER would be the username that you assign to that database
- DB_PASSWORD the password
In the case of this example it would be as follows:
/ ** The name of the database for WordPress * /
define (‘DB_NAME’, ‘masquecm_pruebathemerally’);
/ ** MySQL database username * /
define (‘DB_USER’, ‘masquecm_themerally’);
/ ** MySQL database password * /
define (‘DB_PASSWORD’, masquethemerally20 ”);
With this, we can now access our website. But it is possible that the links do not work and we have to regenerate them.
Conclusion
We have tried to discuss how to transfer a WordPress site from localhost to a live server in a depth way. Try to follow all the instructions that we have given here. Also, check properly the database and the folder names while importing or exporting them. But if you face any interruption, feel free to inform us. We will try to solve your problem soon.